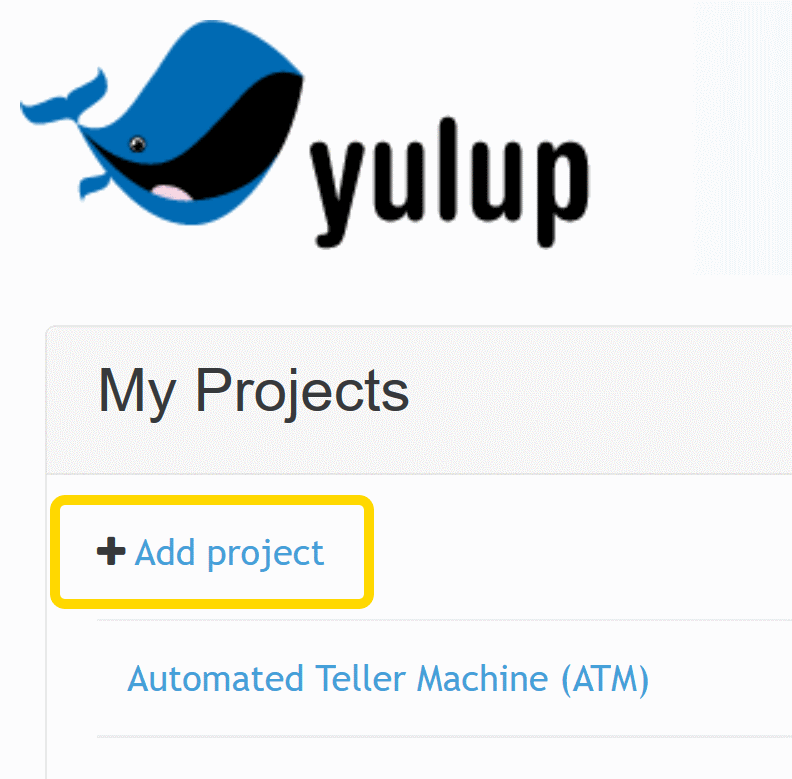
At the overview of your projects click "Add project":
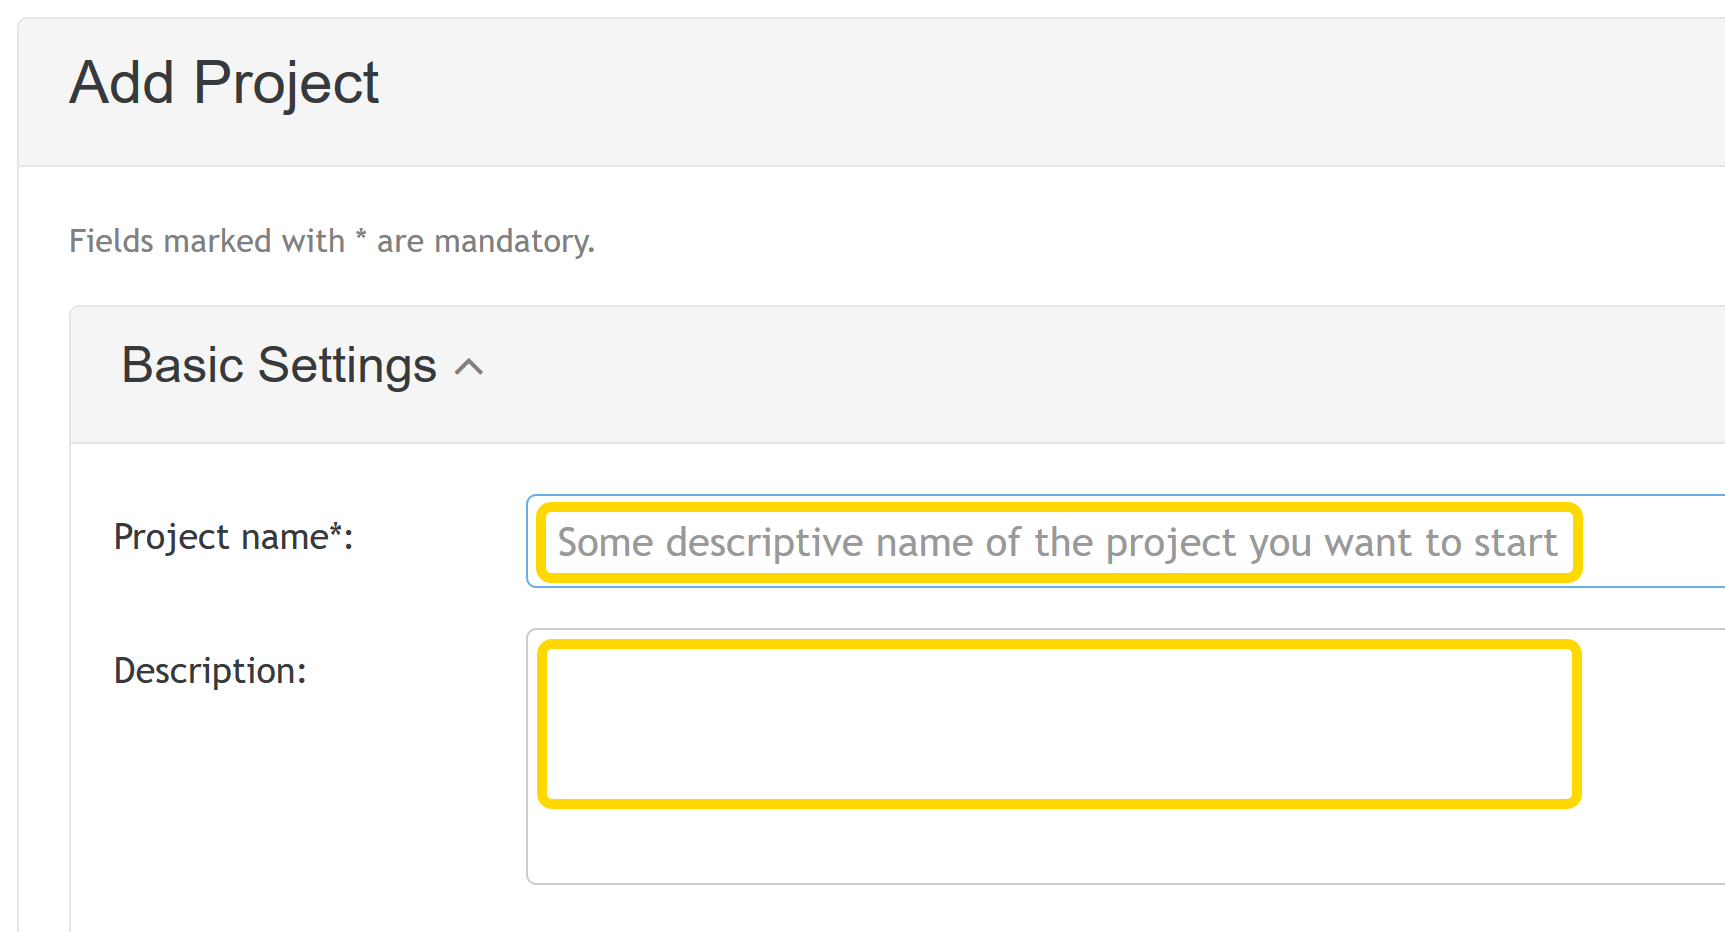
Give a clear, distinctive name to your project. And if you like, you can fill in a meaningful description as well. The other fields of the form are not really important at the moment. So you can leave them empty and just add the project.
This brings up the dashboard of your newly created project. It shows an aggregated view of the most important things of the project. You can have a look at the dashboard of a public demo project for an Automated Teller Machine (ATM).
Table of ContentsAs we all know, this old saying fits especially well for IT projects, too: The specification forms the basement for a successful implementation. That is why Yulup accompanies you and all the other members of your team for the whole duration of your project: from the beginning of the concept phase and also while doing maintenance.
Now go to the section for the "Specification" - if you would like you can have a look at the corresponding section of the project for the cash machine.
If you are familiar with the editor and its add-ons specifically done for Yulup, feel free to start straight away writing your first Personas.
The editor that is integrated into Yulup helps writing Personas, User Stories, and BDD Scenarios. For sure you know similar editors from using Office applications or other web based tools.
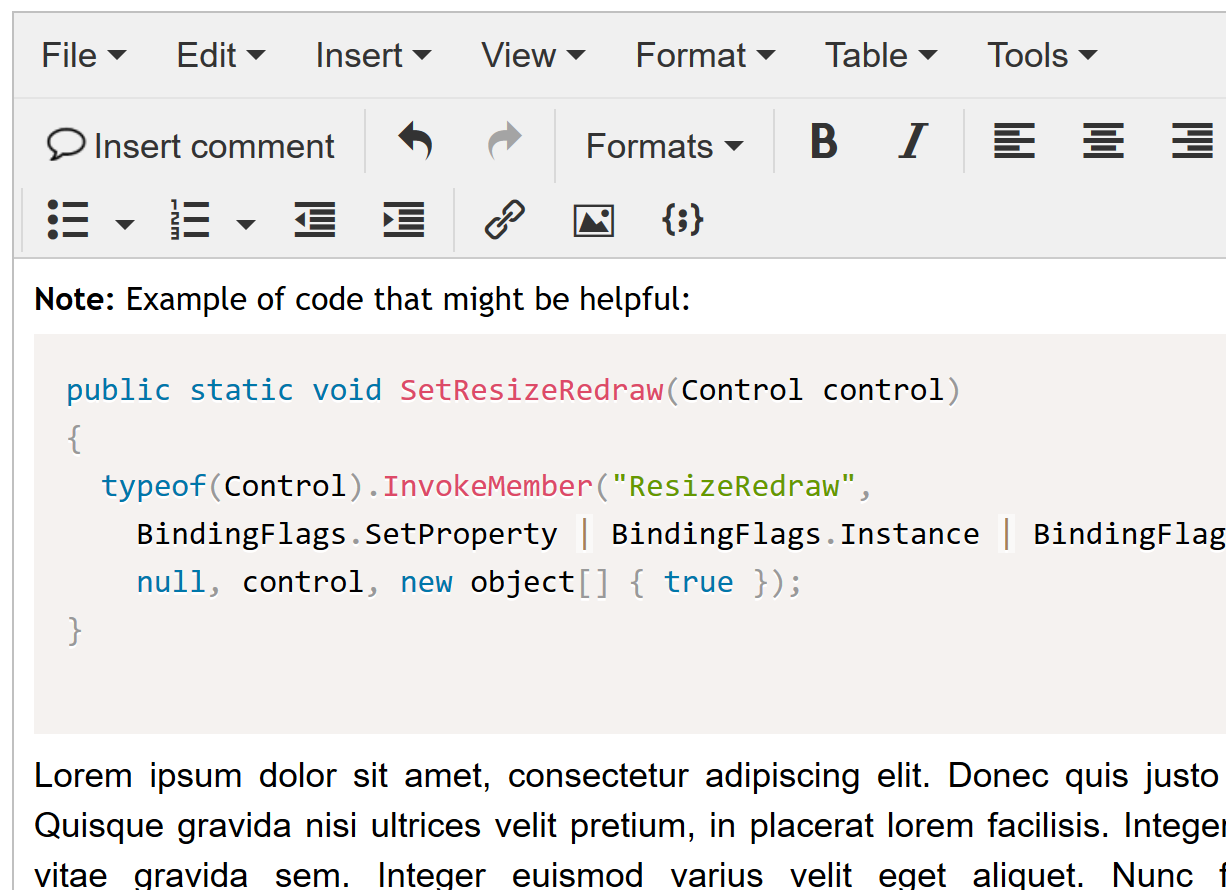
With the editor it is possible — of course — to display text sections in bold or italic and to insert images or lists. But it is also capable of handling comments or code snippets.
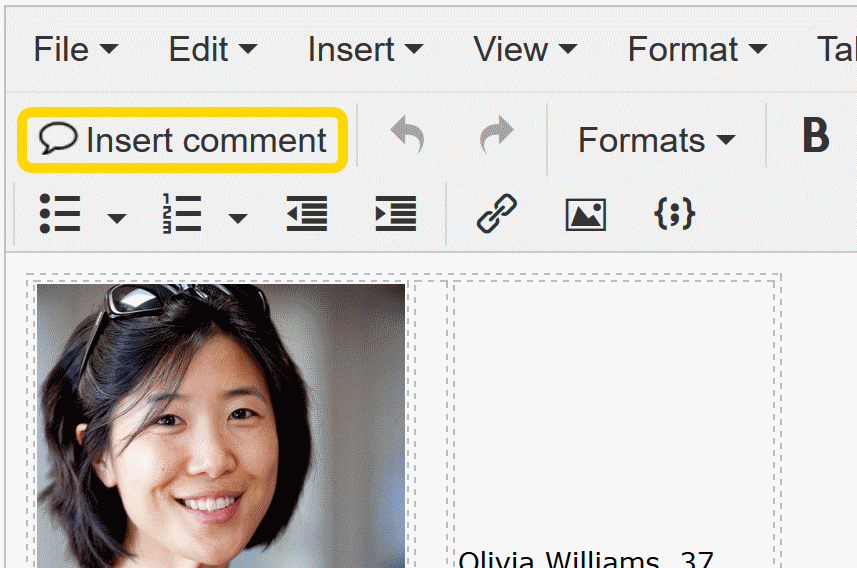
Table of ContentsPlace the cursor at the position where you want to insert a comment. Alternatively you select a section of text that you want to comment on.
Now you can create a comment using the icon for comments within the tool bar.
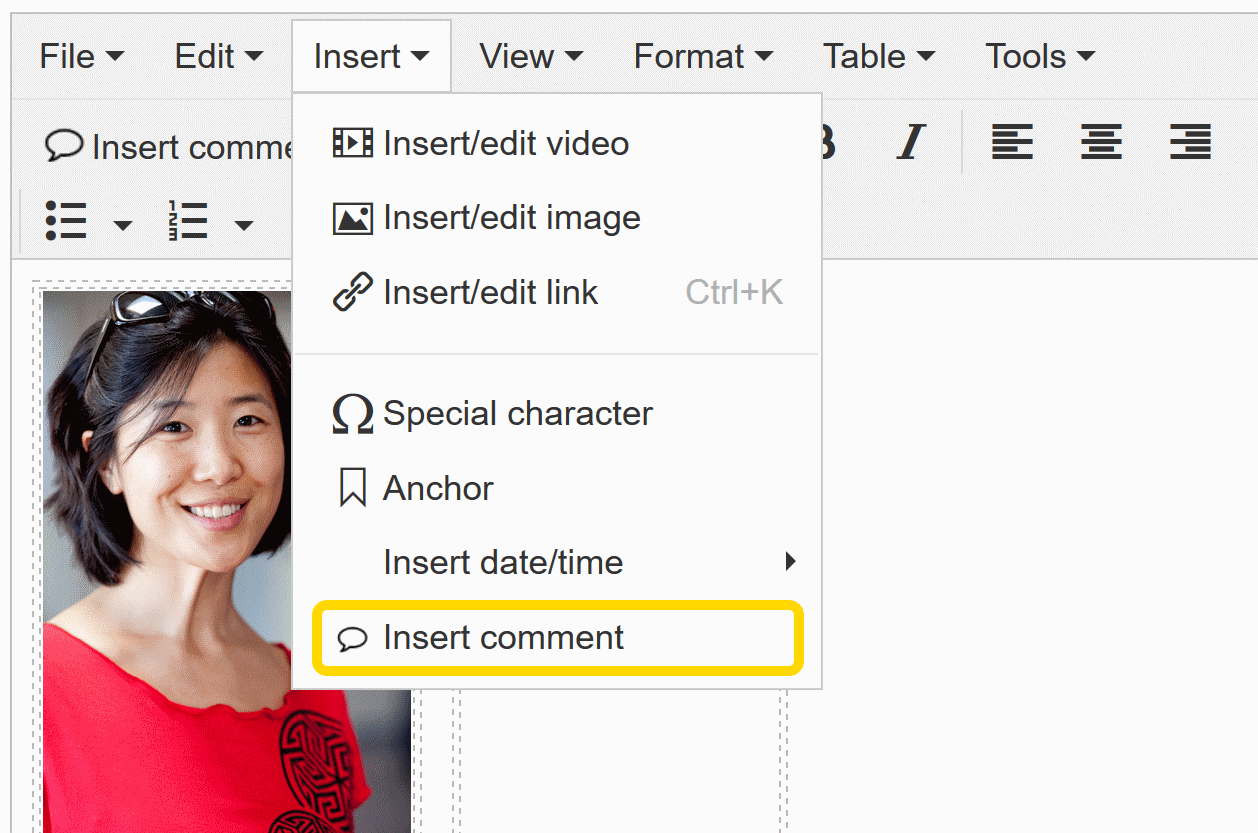
It is also possible to use the function in the menu 'Insert'.
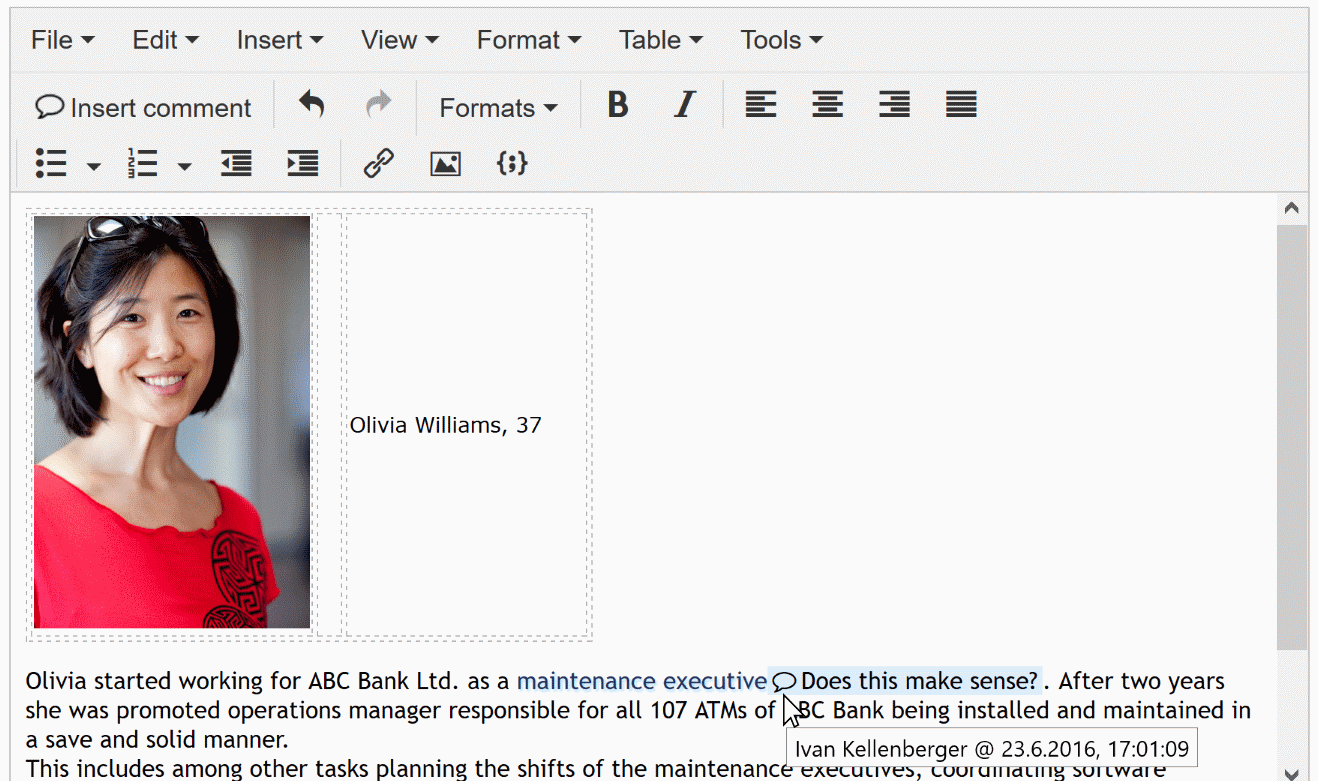
If the mouse pointer is hovering on a comment, the author and the time stamp of the comment will be displayed. This works while editing as well as afterwards.
After saving your changes, you can toggle the comments by clicking a comment.
A comment can be deleted by selecting it with the mouse and then deleting the selection. If some blue marks remain, just select them as well and use the function 'Clear formatting' within the menu 'Format'. See next chapter, too.
Table of ContentsYou can't make an omelette without breaking eggs. And at least the eggshells have to be removed from time to time. This is how you can get rid of all formattings of a section of text:
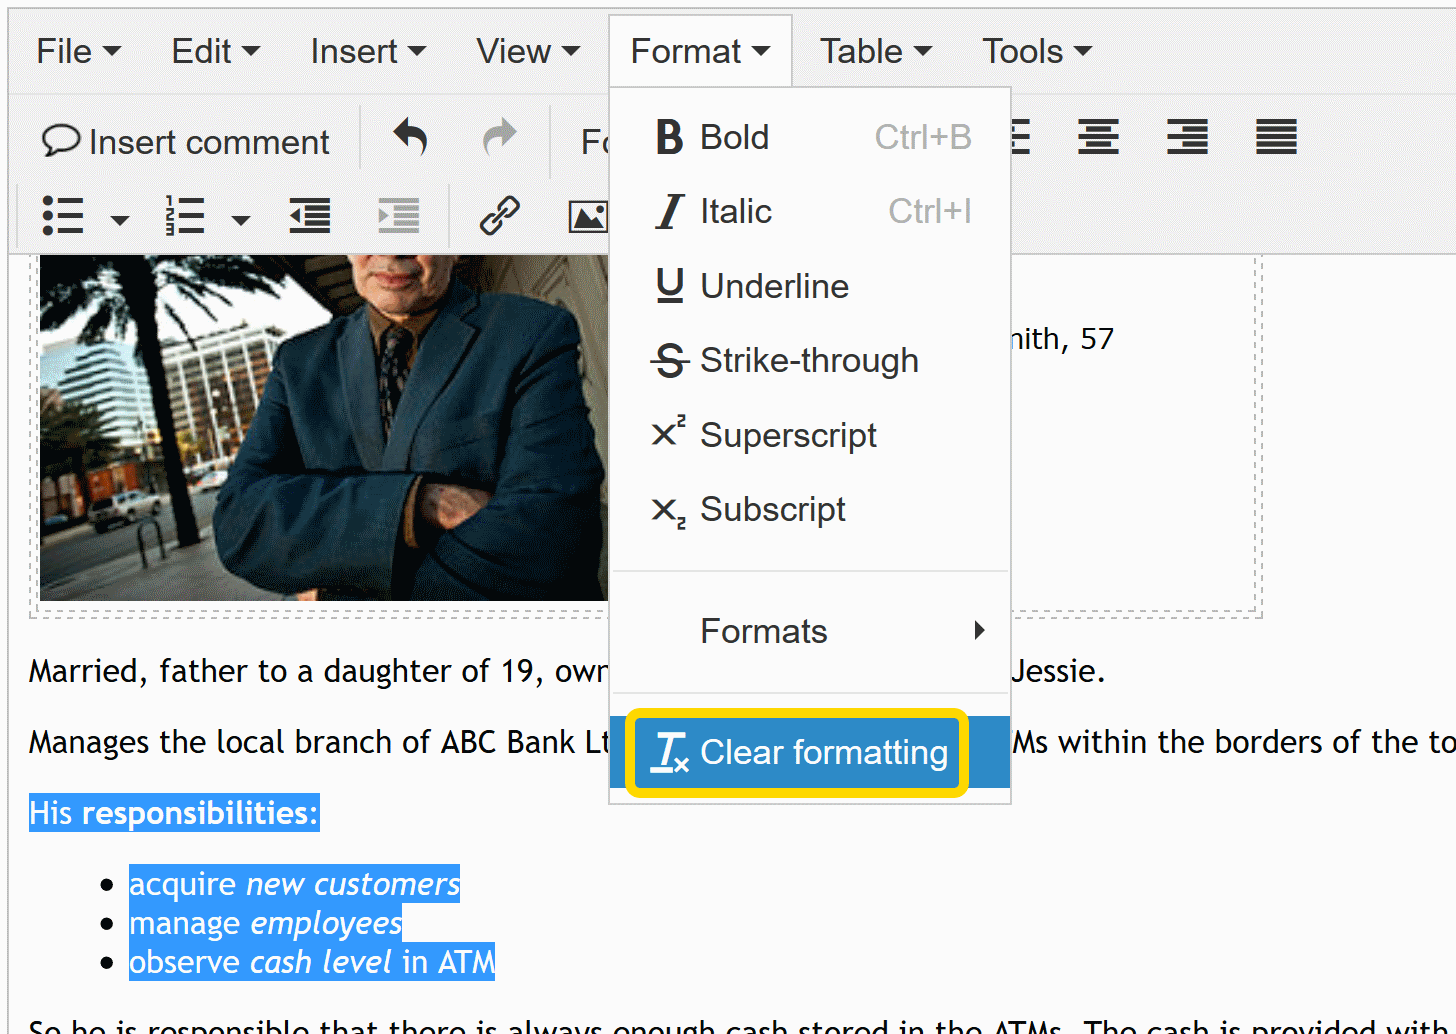
You highlight the corresponding section of text with the mouse and choose the function 'Clear formatting' in the menu 'Format'.
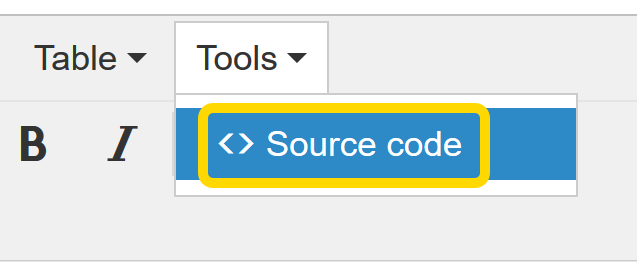
Table of ContentsIf you are fluently speaking HTML, then the source code mode might be your friend! You can directly edit the source code of a Persona, a User Story, or a BDD Scenario by using the function 'Source code' within the menu 'Tools'.
This will open an overlay where you can edit and save the HTML source code of the specification item.
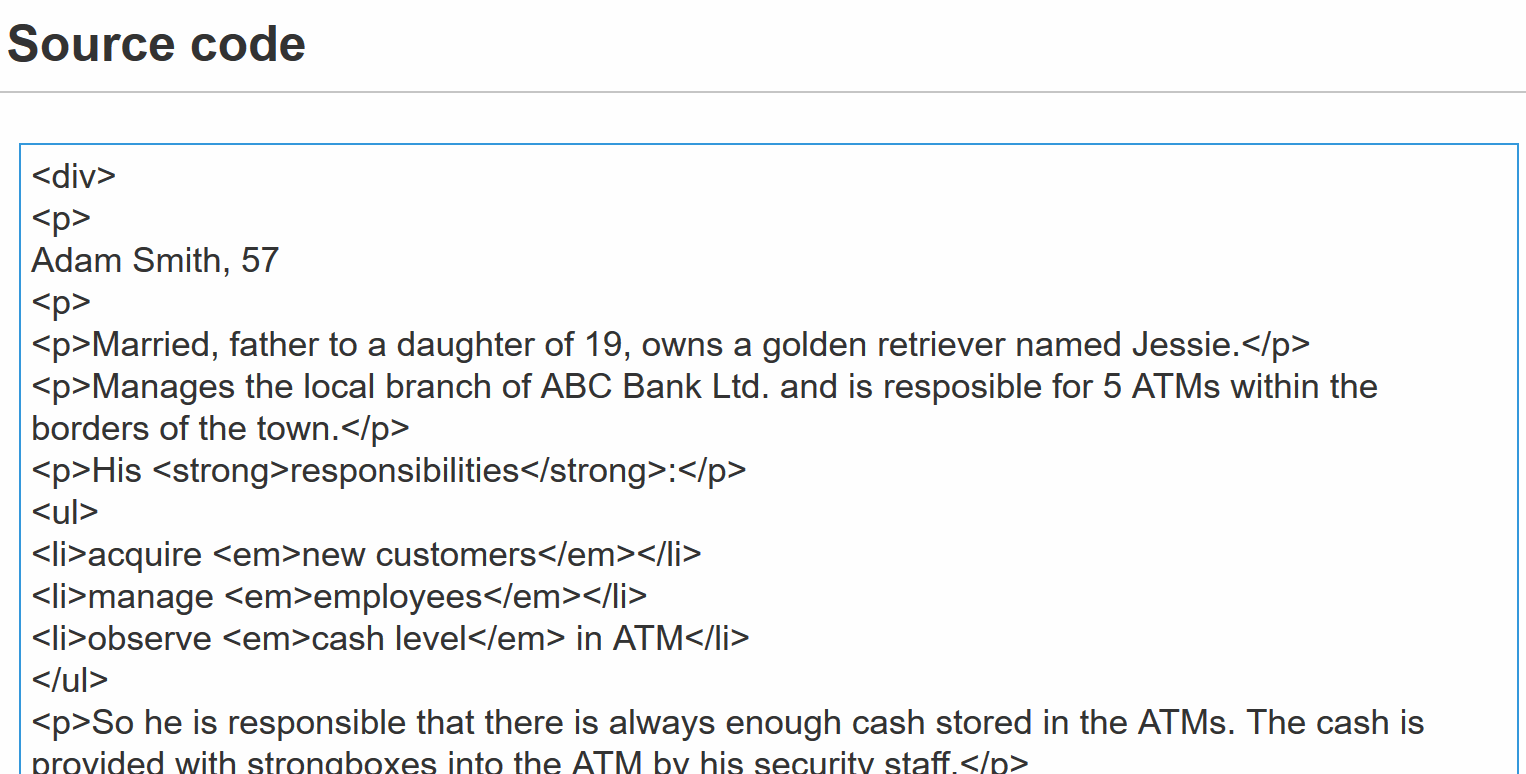
But keep in mind that not all HTML tags are allowed: tags that are not permissible will be removed.
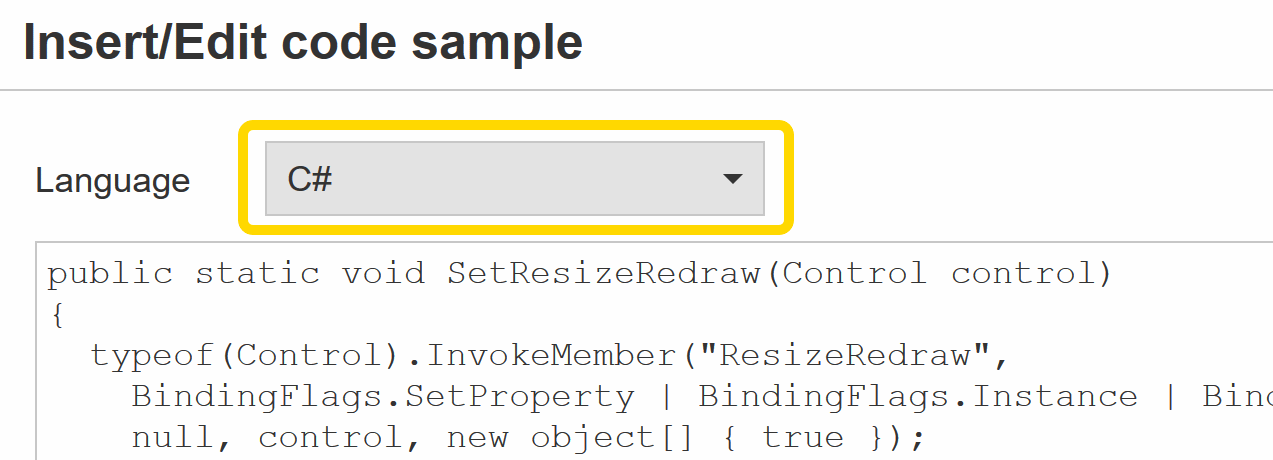
Table of ContentsSometimes it might be handy if you could illustrate e.g. a BDD Scenario by inserting a code snippet. That's why there is a button for that.
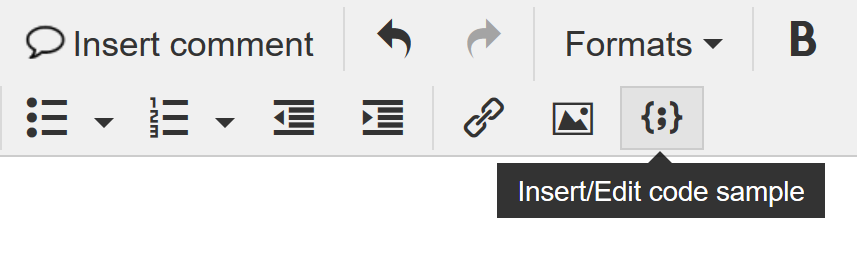
At the top of the window to insert or update code snippets you can select the programming language that is being used for the snippet. This way the syntax highlighting will be working.
So, now you are ready to go!
Table of ContentsIt is recommended to start writing down Personas. A Persona is an archetype of a specific group of users of the project that you are about to implement.
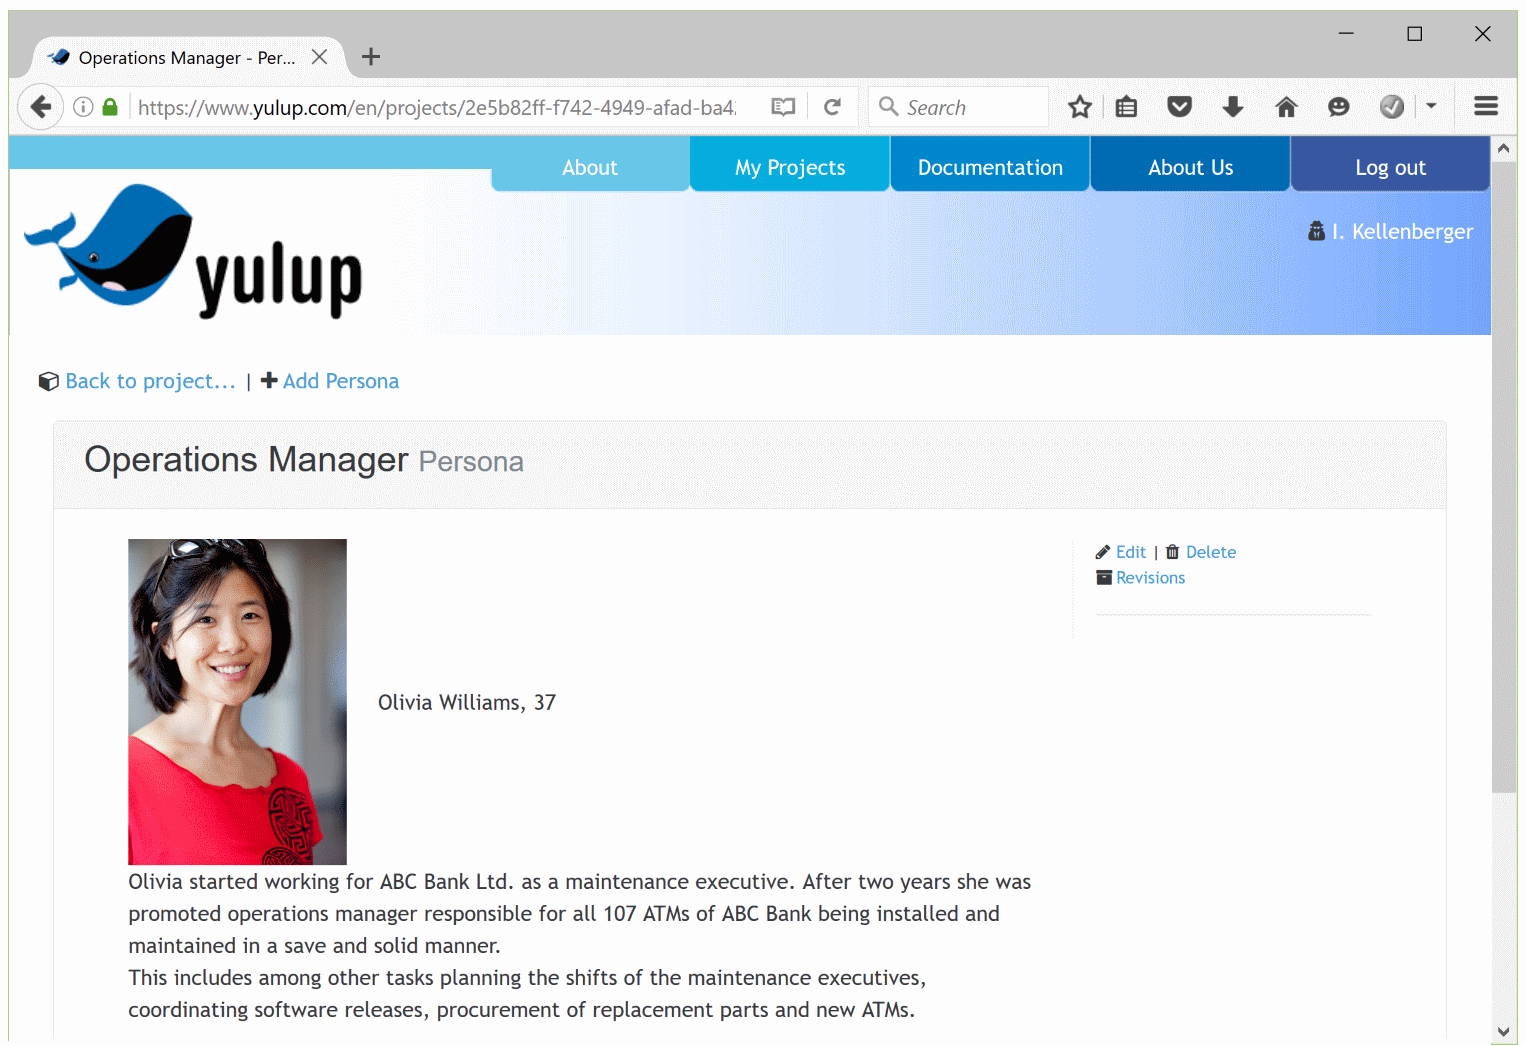
Personas will help you, to see the requirements for your software through the eyes of your users. And not from the point of view of the product manager, the project manager, or the developers. Give your Personas a "face", i.e. among other attributes a catchy name. After that you will write down the expectations of this Persona of your software. Best would be to discuss and amend the Personas together with your team. Example Personas of the project for the ATM.
Now you can depict typical activities with your software for each of your Personas. Every User Story covers a single such operation. They obey an easy scheme (Who does what and why). In a more formal way the pattern is:
"As a/an <role> I want to <goal/desire> in order to <benefit>"
Examples of User Stories:
As an author I want to see my last document when starting the app in order to save time.
As a customer of the bank I want to get cash from the ATM all around the clock in order to be independent of the opening hours.
A User Story describes what a Persona wants to do with the software to be built and what the goal of the activity is — but without digging too much into details. The latter will be defined later on using BDD Scenarios.
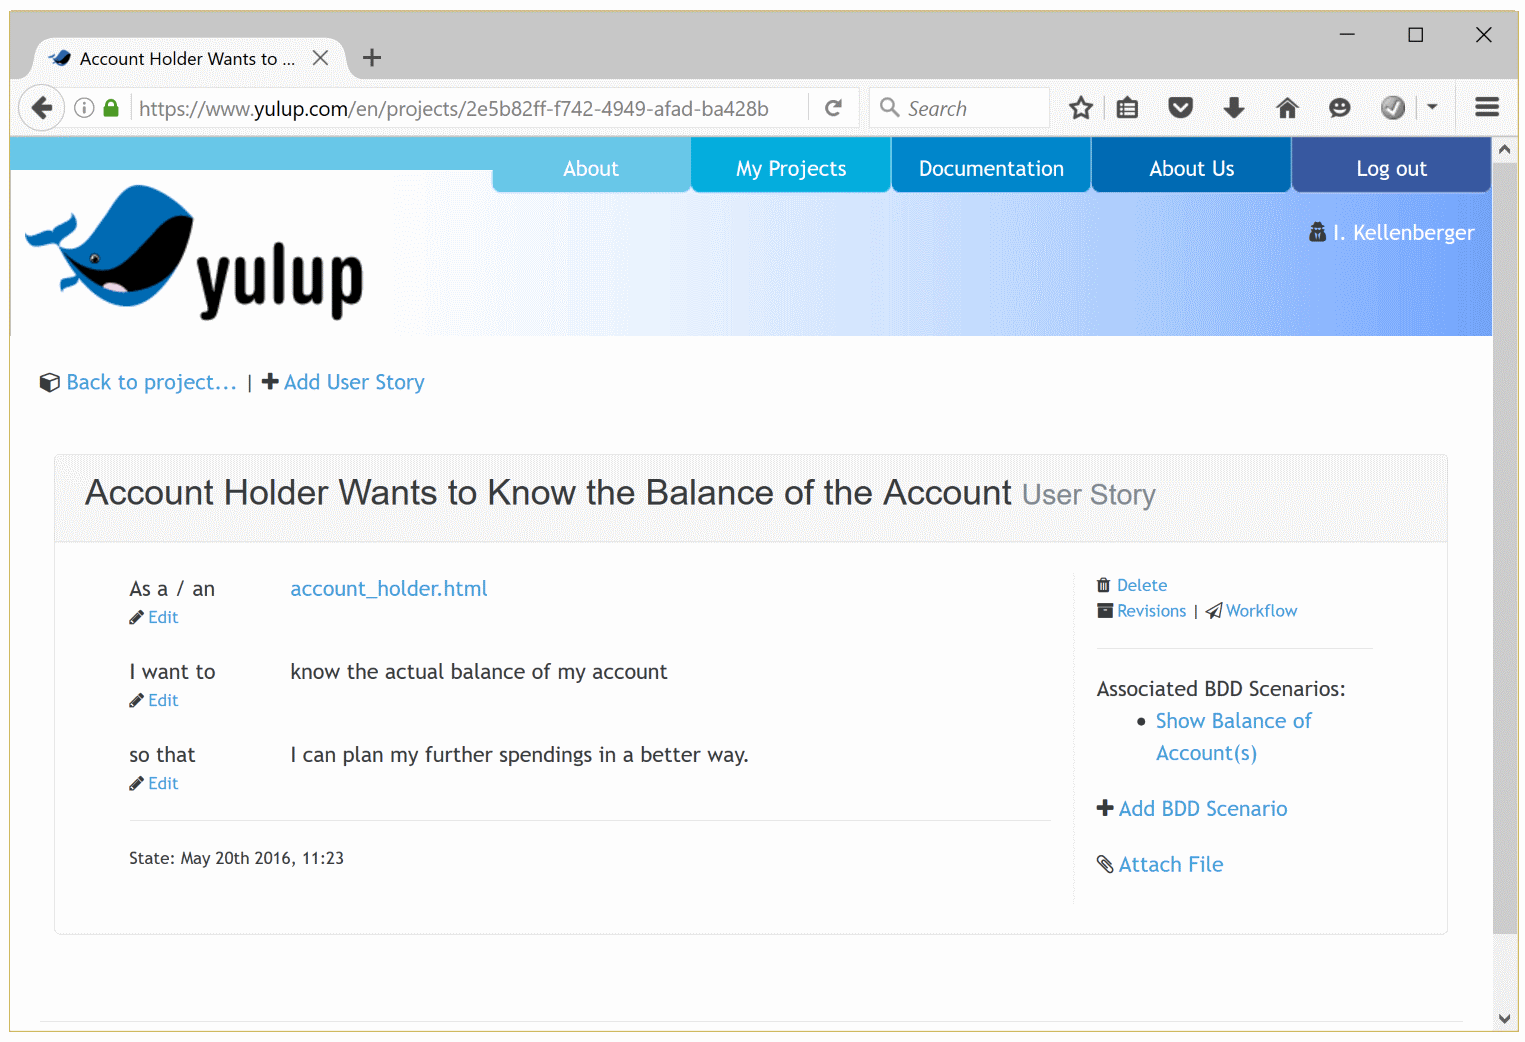
Example User Stories of the project for the ATM.
| Letter | Meaning | Description |
|---|---|---|
| I | Independent | The User Story should be self-contained, in a way that there is no inherent dependency on another User Story. |
| N | Negotiable | User Stories, up until they are part of an iteration, can always be changed and rewritten. |
| V | Valuable | A User Story must deliver value to the stakeholders (Personas). |
| E | Estimable | You must always be able to estimate the size of a User Story. |
| S | Small | User Stories should not be so big as to become impossible to plan/task/prioritize with a certain level of certainty. |
| T | Testable | The User Story or its related description must provide the necessary information to make test development and the writing of BDD Scenarios possible. |
BDD Scenarios do describe in detail, how a certain function under certain conditions should work. BDD Scenarios also define the acceptance criteria for User Stories. BDD stands for Behaviour Driven Development that is also somewhat related to "test driven development". Yulup enables your team to write down the results of the requirement engineering or specification phase in a manner that is easily understandable for every person involved and to use them during all phases of the project. If needed, you can adopt them on the fly.

In contrast to User Stories (Who does what and why) BDD Scenarios determine the "how". You define, what exactly does take place, if in a given situation an action is being triggered. BDD Scenarios are built up according to an easy, pre-defined scheme, too:
"Given <precondition>, when <action>, then <result>"
In order to specify a User Story typically a handful of BDD Scenarios are necessary.
Later on the BDD Scenarios are also the foundation for the information architects, designers, copy writers, and programmers in order to implement the functionalities accordingly. And they are as well the basis for testing and for acceptance.
Example BDD Scenarios of the project for the ATM.
| Letter | Meaning | Description |
|---|---|---|
| S | Specific | A BDD Scenario needs to be specific enough that everyone can understand what's involved in it. This helps keep other BDD Scenarios from overlapping, and helps people understand whether the BDD Scenarios add up to the full story. |
| M | Measurable | The key measure is, "can we mark it as done?" The team needs to agree on what that means, but it should include "does what it is intended to," "tests are included," and "the code has been refactored." |
| A | Achievable | The owner of a BDD Scenario should expect to be able to achieve it. Agile teams have a rule that anybody can ask for help whenever they need it; this certainly includes ensuring that the owners are up to the job. |
| R | Relevant | Every BDD Scenario should be relevant, contributing to the story at hand. Stories are broken into BDD Scenarios for the benefit of developers, but it should account for the benefit of a future user (Persona). |
| T | Time-Boxed | A BDD Scenario should be time-boxed: limited to a specific duration. This doesn't need to be a formal estimate in hours or days, but there should be an expectation so people know when they should seek help. If a BDD Scenario is harder than expected, the team needs to know it must split the BDD Scenario, change players, or do something to help the BDD Scenario (and story) get done. |
Yulup offers you the possibility to choose between several schemata for User Stories and BDD Scenarios when creating a new project. Depending on the chosen schema the wording differs slightly. This results in a different flow when writing or reading the specification items. And you might be able the write the User Stories and BDD Scenarios more fluently.
Which variant you choose is totally up to you. Additionally it is possible to set the language for the specification independently from the language you are using for the rest of Yulup.
Yulup is connected with your source code repository. As soon as changes take place in the source code repository, they will show up in Yulup in the section "Changes".

There you can associate a code file with tests. These tests can either be an automated test or a BDD Scenario, that has previously been written down in the section "Specification". From now on all the automated tests will be performed when a change takes place to this file, and the result is shown in Yulup. This way you are always able to see what went well and where a hickup happened. On the other hand all the tests that have to be performed manually are listed in the section "Pending Tests".
Table of ContentsTesting, we will never do enough of it.
What is true for bicycle racing unfortunately is valid for most of the software projects, too. Often there are neither enough time nor resources to perform all tests e.g. after an update to a software.
That's where Yulup will help you as well. It lists all the tests that should be conducted after a change. All other tests do not have to be performed, as they are not relevant to the change.
You know how time-consuming testing can be if it has a fixed space in your project plans. But Yulup will help you significally reduce the effort for testing.
And if — until now — you had the impression that testing has been somewhat neglected, then Yulup will show you, what you should be testing (and what can be omitted).
The section "Pending Tests" will show you all pending, manual tests — for all branches that are available in your source code repository. There you directly can — after a test being conducted — update its outcome.
About Yulup
Made with in Zurich:
![]()
